Tuesday, June 30, 2015

The Garden Panini (Now with Cheese!)

The hospital I volunteer at lets its volunteers eat one meal free each week at their cafeteria.  I know, hospital food, right?  Wrong.  This hospital food is actually pretty well-known for being awesome.  I have literally seen couples out on dates to this hospital’s cafeteria.  Which, kinda weird, right?  Or is it just me?  “Thanks so much for agreeing to go out with me.  I was thinking we’d go to this quaint little restaurant right in the middle of town…I mean, it’s the hospital, but…Hey!  Where are you going?”

And we’re back on track.  So being a vegetarian means I don’t eat probably 75% of their incredible wares, but I jump on every vegetarian opportunity that presents itself.  Enter the artichoke panini.

The cafeteria cycles their menu, so it only comes around every once in a while, but this artichoke panini has never disappointed.  It’s warm and filling and delicious and pretty much everything I could ever want in a panini. 

So the other day I decided that I was going to copycat this recipe for The Man and me to have for dinner.  Unfortunately, there was no recipe to copycat, as the hospital does not post their menu online, so I had to guess and improvise (story of my life when it comes to recipes).  Enjoy my version of The Hospital Panini!  No, that doesn’t sound appetizing.  The Garden Panini (Now with Cheese)!


The best part of this panini (and any panini) is it’s all about whatever you want.  This would be equally good with olives, mushrooms, kale, or even turkey or ham in place of the artichoke.  Just don’t pile on too much or it’s gonna look like Carl’s Jr. up in your house.  I used spinach, artichoke hearts, red Bell peppers, tomato, red onion, parmesan, mozzarella, and some ciabatta rolls.

Start off chopping up the pepper and onion – I like mine in cubes but again, all up to you.  Fry the onion with a bit of butter until it becomes almost translucent.


If you’re lazy like me and you bought grated cheese then you’re good to go, otherwise grate your cheeses up.

Cut the rolls in half (I tried to leave ‘hinges,’ but that didn’t work out for me – maybe it’ll be better for you) and start piling on the goods.  By the way, I just kept the hearts like they were when I pulled them out of the jar this time around; when I made these later I separated the hearts a bit more and The Man said the sandwiches were much better because of it.

The Man likes tomatoes.  I do not. 
Cook your panini for about 6 minutes at medium heat, or until the cheese melts.  When we got married The Man and I registered for this griddle
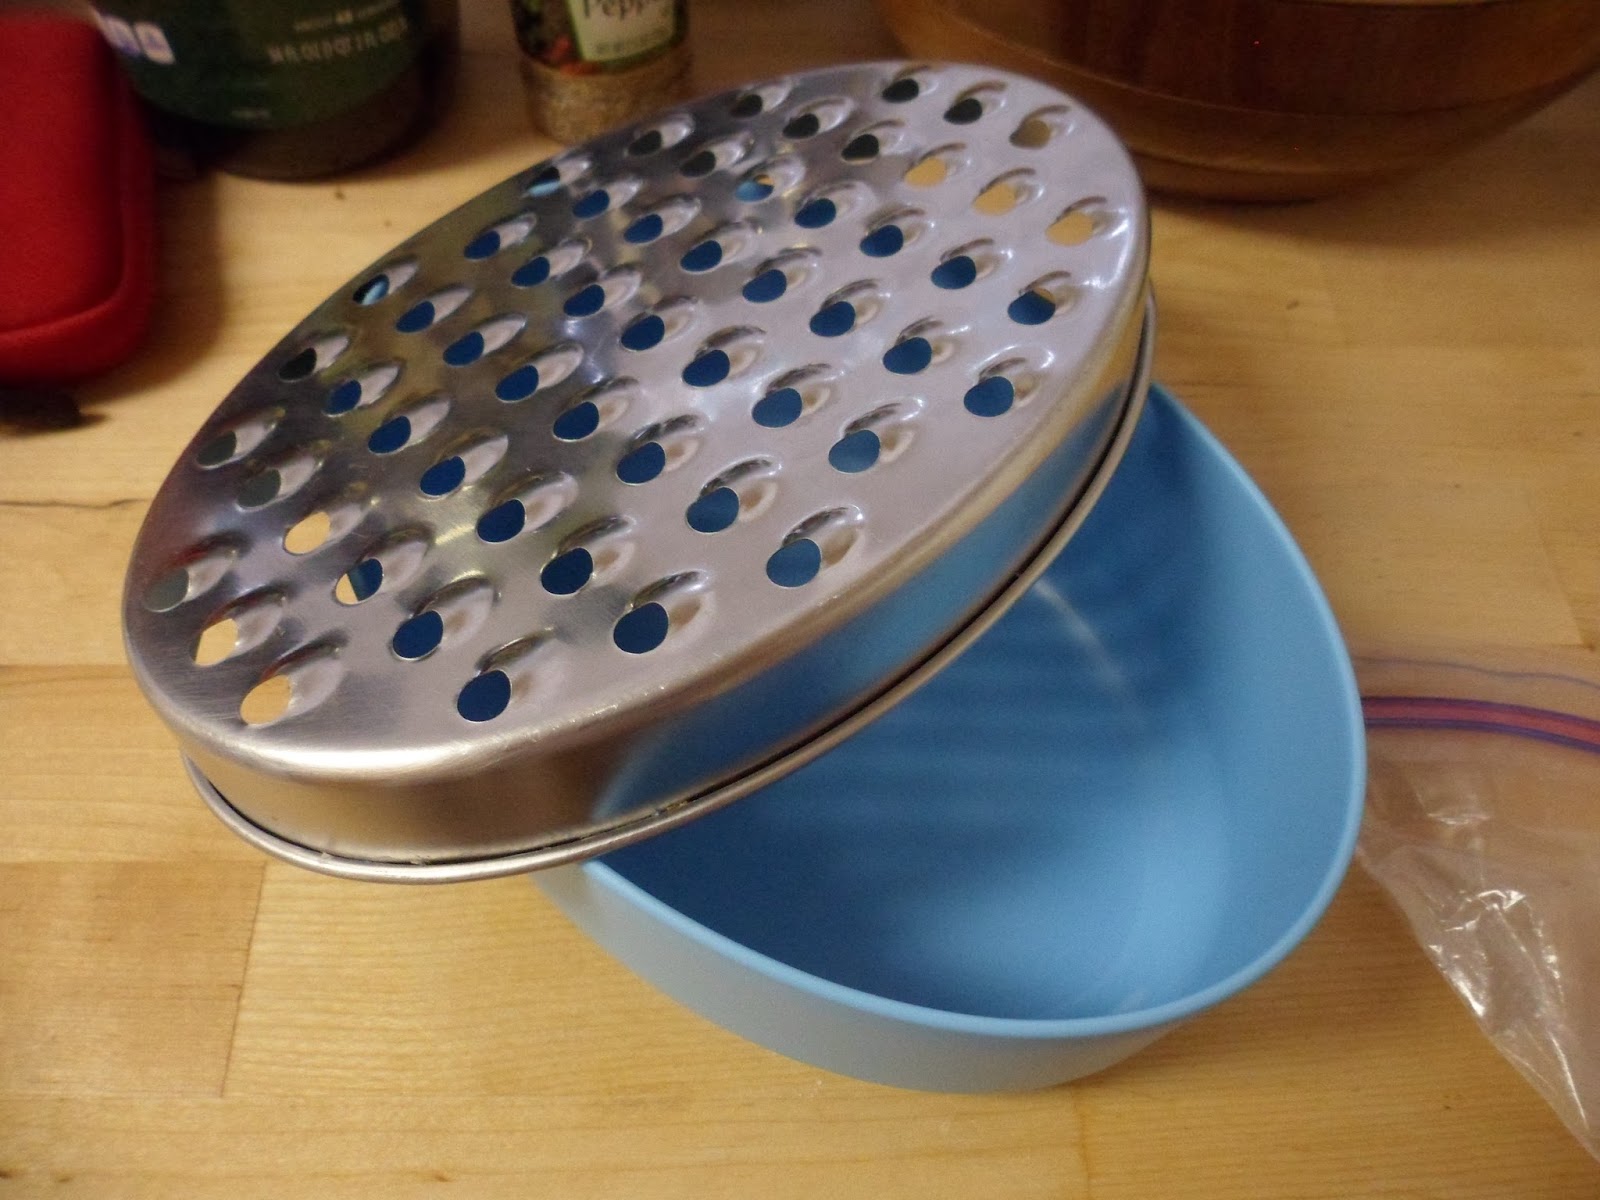
.  It’s seriously one of my favorite cooking utensils, but that might just be because I love grilled cheese sandwiches.  It can also cook burgers, chicken, and pretty much any other solid food you want grilled – pancakes are probably a no-no due to its slope ;)  The only downside is its size; I could only cook one panini at a time.  

Not so great...

Perfect!
Let it cool off for a bit and then enjoy your crunchy, juicy, healthy-ish goodness!


The Garden Panini (Now with Cheese!)
makes 2 sandwiches

Ingredients:
¼ T butter
½ C chopped red onion
1 C spinach
¼ C red Bell pepper
~8 artichoke hearts (I used marinated ones from a jar)
½ C mozzarella
¼ C Parmesan
1 medium tomato, thinly sliced
2 ciabatta rolls

Directions:
-chop the onion and pepper, grate the cheeses
-fry the onion with the butter until onions are translucent
-cut the rolls in half and pile on the veggies and cheese
-grill for about 6 minutes at medium heat (until the cheese melts)
-enjoy!


Wednesday, June 24, 2015

No-Sew Workout Shirt

Despite being born in Texas and raised in Southern California I’ve never really gotten used to the heat.  If it hits around 80° F my body freaks out and starts over-producing sweat because it’s so sure that I’m going to die.  I tell you about my hyperhidrosis for two reasons:

1.       I have ruined a lot of shirts because of sweat.  Which is disgusting, I know, but there you have it.
2.       When it’s summertime I like to wear as little clothing as possible.

These will both become important later.

Being a Mormon, I usually dress modestly in the summer (knee-length shorts, sleeves up top), but I get one gimme: exercising.  If I’m in working out I don’t feel as bad about showing off my pearly-white thighs and shoulders.  So when summertime hits I find reasons to wear workout clothes.  Gonna do dishes?  It gets hot in my kitchen; I should probably put on workout clothes.  Working in the yard?  Exercise!  Workout clothes!  Watching a movie?  Maybe I’ll do a couple sit-ups later…I should probably put on workout clothes.

Being in an apartment that doesn’t have AC doesn’t help my modesty much either.  I mean, it’s been in the 90’s lately.  When I’m not in the public library stealing their AC I’m at home with the curtains closed and both box fans running, and that’s still not enough sometimes.

So when I found this no-sew workout shirt tutorial, it was like a ray of light descended upon me.  I mean, I need more workout shirts, I have a t-shirt I love that’s been destroyed by pit stains, and I don’t have a sewing machine.  Ba-da-bing!  Plus the girl who modeled it looked awesome, and I imagined that if I made a shirt like that I would look like a hot punker too (it doesn’t work that way, guys; I was wrong).

Since I knew it was probably going to turn out terrible, I decided to document the experience for today’s post.

    1.       Choose a shirt that you won’t mind cutting up.  I chose my Camaro shirt due to its stains and my deep love for it but my distaste for wearing it now.  I figured if I ruined it I’d survive.


    2.       Lay your shirt flat on the floor.  Check that it’s totally flat.  Re-check that it’s totally flat.  If you don’t re-check, you’re going to get a weirdly asymmetrical shirt.


    3.       Cut off the sleeves and collar.  I just cut immediately to the inside of the seam; that way I was following a line and my cuts were nicer (but still not great…left sleeve…).


    4.       Admire yourself and your puny muscles in the mirror.  This step is imperative.


    5.       Decide how thin you want your straps to be and make a mark on your shirt to cut from.  I then made dotted lines on the shirt because I knew if I didn’t have something to follow my cuts would end up all over the place.  I wish I had made the straps more uniform from the get-go though; I ended up trimming them a couple of times.


    6.       Cut out the back collar – it should be lower than the front.  I thought I was going to be all fancy and make a v-neck back (using two of Stormageddon’s favorite books to make the v), but that was a stupid idea.  Scoop-neck that sucker.  It will be much better for when you tie off the back.


    7.       Put the shirt on, go to a mirror, and determine where you want to tie the straps together by pinching the fabric at the back at different heights – I went with a low tie.

    8.       Place the shirt on the floor face-down, and grab a strip of fabric that you previously cut (I used the collar).  Bunch the back straps (isn’t there a BBQ food called that?) together in the middle.


    9.       Slip the strip (hehe) under your straps and tie a double knot.  Try on the shirt.


   10.   If you like it as is, awesome.  I ended up trimming the arm-holes, the neck, and the back straps some more; don’t feel bad if you have to as well.  No judgement.

   11.   Admire yourself some more – that’s why man invented mirrors.  And yes, my shoulders really are that wide; I did not photoshop myself to look like Michael Phelps.


My shirt turned out passable, which was a surprise, but even if it didn’t I’m just wearing it to work out (or do dishes, or watch a movie, or play in the backyard), so it really wouldn’t have mattered much if it turned out gross.  All in all it was a pretty enjoyable way to pass Stormageddon’s naptime.

Tuesday, June 23, 2015

Why Mars and Venus Collide – John Gray, Ph.D.

Today we’re talking about one of John Gray’s works (he of “Men Are from Mars, Women Are from Venus” fame).  It’s not bad.  Not outstanding, but definitely not the worst relationship book I’ve read. 
Hover and Click - you remember the drill
(Oh no!  Not the drill!)
Like everybody else and their mother, I’m in the process of writing a book.  In order to create the best possible product I’ve been reading a lot of self-help relationship books, and it’s ridiculous how boring some of them are.  I mean, they should be really really interesting; you’re trying to fix your relationship – you deserve an interesting book!  However, the majority that I’ve read say what they want to say in the first couple of chapters and then repeat it over and over, with the author using plenty of stories from their time as a therapist/psychiatrist/psychologist/what have you.  The best part is, the reader has no way of knowing if those stories are true.  The author could just be making them up entirely; I have yet to find the interviews listed in the sources.  Dr. Gray does not commit the sin of potentially made-up stories to prove points, but a large portion of this book IS repetition.

I could probably sum up the entire book right now.  Ready?
Men: Your woman needs to be seen, heard and supported.  Don’t interrupt and try to fix her problems when she’s talking, just make “supportive noises” (no, seriously, that’s what it says).
Women: Your man needs time to de-stress after work.  Also, if you want him to do something, tell him in clear and specific terms – men love projects.
Both: Keep yourself happy and fulfilled.  It is your job to make sure you’re happy; it is your partner’s job to make sure you’re happier.  When arguing, make sure you validate what they’re saying and clarify so you don’t misinterpret what they’re saying.

Aaaand…that’s it.  He also promotes his other books/website/diet a lot.  Haha…his diet…It’s all about “oxygenating your cells” and “de-toxifying your cells so they can allow more good hormones in.”  Psuedo Science at its worst.  Want some diet advice?  Eat more veggies, especially the leafy greens.  Eat more fruit.  Eat more whole grains.  Drink more water.  Those four things should make up the majority of your diet.  Done.

In all honesty though, his message is a good one.  From the research I’ve done I’d say his advice is pretty darn sound, and he’s not annoying/pompous/boring, so his book is an easy read.  You’ll even get a few laughs out of the process!  I mean, not on purpose, but still.

See, somewhere in the middle of the book is where he got me laughing.  For one, he is convinced that ALL women have a running point system in their heads, and that women always give themselves points for every tiny thing they do for their husband, and their husbands earn points only for the big things they do.  It’s ridiculous.

Another source of entertainment is what he believes all women want to be happy.  Now, I understand that this is a book about gender differences, but his views are a little antiquated.  My favorite example is from his list “One Hundred Ways a Man Can Raise a Woman’s Oxytocin Levels:” Get a small TV or radio for the kitchen.  His “One Hundred Ways for a Woman to Create Oxytocin on Her Own” is pretty good too, with suggestions such as: cook a meal with a friend and clean up together, ask someone to carry something, participate in a PTA meeting, and learn and practice a new diet plan or cleansing program for better health (oh, you so sneaky Dr. Gray!).  There’s another suggestion in the book (I’m struggling to find what list it’s in) that men should buy their wives fancy guest soaps to make them happy.  Because that’s what would really excite me – The Man coming home with a new guest soap.

So if you’re looking for a relationship-help book with mostly sound advice and a few snigger-worthy moments, this is a good one to read.  It’s definitely not the worst you can do.


Friday, June 19, 2015

What RV is Right for You? Part 2 – Motorhomes

You’ve been waiting all week for this, haven’t you?  If you missed the first part of this series (types of trailers), stop for a bit and go read it.  Or look at the spreadsheet.  Whatever.  I don’t know your life.

Today we’re going to delve into the wonderful world of motorhomes and their nonsensical class system (similar to India’s caste system, only not at all in any way).  There is one super-important thing to remember when you’re thinking of full-time motorhoming – if your motorhome goes into the shop, your whole house goes into the shop.  Not so with trailers.  If you’d like the easier set-up/take-down though, motorhomes are the way to go.  And we’re off!

Motorhomes

Class A
Are you well-off?  Do you eat desserts made with edible gold leaves?  Do you love being the biggest thing on the road?  Do you love having a huuuuuge windshield with an awesome panoramic view?  Hey-hey!  Have I got the motorhome for you.  Class A motorhomes are the biggest you can get.  These are the flat-fronted beasts of the RV world. 

Living space: Class As have two or more slides (read part 1 if you don’t know what that means), so there is plenty of room to stretch your legs.
Storage: Interior storage is pretty good due to their large size, and their exterior storage is the best money can buy.  Go ahead, bring that baby grand (but not really; that would be a very stupid idea).
Versatility: Unfortunately due to their awesome exterior storage, these have really low ground clearance.  They’re safer if you stay on paved roads or very nice dirt roads.  And since they’re tall (like a 5th wheel) you have pretty bad height clearance as well.  Once again, look out for short bridges and low branches.
Driving: High wind resistance, not the best visibility (if you choose to tow a car, get a camera), and kinda noisy if you get a “gasser.”  If you’ve got the money for it, spring for a diesel.  Their rear engines are quieter, more powerful, and longer-lasting. 
Gas Mileage: 8-10 MPG.  But you should have been expecting that.
Extra Needs: If you decide to tow a vehicle (colloquially known as a TOAD), make sure you get brake and light hook-ups along with your hitch.
Set-up/Take-down: Da best!  Since these are top-of-the-line, you just press a button, your jacks do the work, and you’re ready to play.  Unhitching your TOAD can be a pain though.
Costs: 50k-80k new, and these can get up to 800k if you’re insane.  Keep in mind that motorhomes will need more maintenance than trailers as well, so there’s some more cost.
Extra Tidbits: It’s hard to grocery shop with a class A.  TOADs are a smart idea.


Bus Conversions
I love this idea.  It’s kinda the hipster rage among RVers.  Pretty much you take an old bus (Greyhound or school are the most popular), gut it, and build a house inside.  Since it’s so popular, you can buy them pre-made or you can get creative and make your own. 

Living space: Technically these are class A motorhomes, but they don’t have any slides.  Still rather roomy due to their width and high ceilings though.
Storage: Depends on the type of bus you convert.  Greyhound buses usually have some exterior storage, while school buses don’t.  Interior storage is pretty good for both, and you can always fabricate extra shelving or something.
Versatility: Greyhounds need to stay on the pavement, but are welcomed into RV parks.  School buses can go pretty much anywhere (beast!), but some RV parks don’t like their aesthetic, so they might not let you in.
Driving: You might need a commercial driver’s license for these.  I’m not totally sure.  They do have high wind resistance/poor height clearance and everything that comes with a class A.  Greyhounds tend to be quieter, school buses tend to be louder.
Gas Mileage: 6-8 MPG.  Yeah…
Extra Needs: You’re probably going to want a TOAD and a generator.
Set-up/Take-down: Park on level ground.  That’s pretty much it, unless you install hydraulics or something.
Costs: These are a great deal – pre-made run from around 15k-25k, but if you can build your own it can be 10k or less.  The shells usually cost around 5k, and the remodel fees are up to you.
Extra Tidbits: It’s a bus.  It’s made to last forever.  So these are tough, safe, long-lasting, and awesome.  If you do break down though, it’s expensive.  Not many places are equipped to fix buses.

Class C
Trust me, I know my alphabet.  I know B comes after C.  Whoever made up motorhome classes didn’t know that though.  Class Cs are the motorhomes with the little bitty beds above the cab.  You know the ones.

Living space: Imagine a tiny apartment.  Like, in New York or something (not Hollywood’s NY though, where every waitress can afford a 3-bedroom).  That’s what you get with a class C motorhome.  Lots of them come with slides, so these can be pretty roomy.
Storage: Interior and exterior storage are both pretty good, but not as great as a class A.
Versatility: These have better height and ground clearance than class As, but they’re not as versatile as trailers.  You can drive these in town, but it’s a hassle; best to bring a TOAD.
Driving: Again, better than the class A but not great.  Get a camera if you have a TOAD.
Gas Mileage: 10-12 MPG (hurrah!)
Extra Needs: Same as a class A.
Set-up/Take-down: Same as a class A.
Costs: 50k-80k new (up to 140k).  Also need maintenance more than trailers.
Extra Tidbits: You can’t tell from this segment, but this is the kind of motorhome The Man and I would get.  Big enough for a tiny family, small enough that you can boondock a bit (long-term camping).  These are safer than class As and the cost difference between gassers and diesels isn’t as severe, but diesels are harder to find.  Try to find them.

Class B
Like Chris Farley, you too could live in a van down by the river!  These are often called van conversions or camper vans.  Why they’re B and not C, I’ll never know.  Because I’m too lazy to look it up. 

Living space: No, it’s seriously a van, guys.  Have you ever heard of a “wet bath?”  Your toilet and sink are INSIDE your shower.  Inside.  You shower over your toilet.  These do have tall ceilings, so you can usually stand up okay, but there aren’t any slides.
Storage: You’re going to find minimal interior storage and little-to-no exterior storage.  Remember in “Flight of the Conchords” when Jemaine lived in a storage closet?  You can experience that first-hand with a camper van.
Versatility: Here’s where they start to get awesome.  Where can your van go?  Your class B can go there too.  No TOAD needed.
Driving: Can you drive a van?  You can drive a class B!
Gas Mileage: Class Bs are vans.  Can I say this enough?  You’ll get the same mileage as a van.
Extra Needs: None!  You’ve got the super-van!
Set-up/Take-down: Park on level ground.  Bam.  Go play.
Costs: If you buy a new class B it will cost 40k-80k usually, but it can cost up to 125k.
Extra Tidbits: This is the smallest and safest motorhome.  If it’s just you, why not go for it?

Now that you’ve read both parts of this series, it’s pretty easy to see that there’s no one perfect answer for which RV you should choose.  A single person would have different needs than a family.  Someone living full-time would have different needs than a weekend camper.  Some people love luxury, some people want the bare minimum. 

Before buying an RV, talk to RV owners, test drive some RVs, maybe rent one you like for a week.  The RV Consumer Group (RVCG) has ratings listed for different makes, models, and years at www.rv.org; definitely check that out before purchasing.  Do your own research, figure out what you like, and, most of all, have fun! 

Tuesday, June 16, 2015

The Mating Season – P.G. Wodehouse

Do you remember back in the day when the internet was shiny and new and “Ask Jeeves” was the search engine of choice?  The image next to the search bar was a nicely-dressed, well-groomed butler.  Did you ever wonder where Jeeves got off being such a know-it-all?

Wonder no more!

I was first introduced to Wodehouse’s work through my little sister, albeit in an indirect manner.  In his younger days Hugh Laurie did a television show called “Jeeves and Wooster.”  And it is wonderful.  The show is based around 1925 or so and focuses on one of the ‘idle rich’ – Wooster – and his manservant Jeeves.  Wooster is a bit of an ass (his words, not mine), and Jeeves is a wealth of knowledge who often uses Wooster as a pawn to accomplish certain things.  If you are good at deciphering strong and fast British accents, this is the show for you.  In fact, try it out right now!  If you hover over the picture it can take you to Amazon's website, where you can watch it online!  

The first few minutes are kinda meh, but stick it out; totally worth it!
So the covers of the DVDs all say that the series is based off a series of books by P.G. Wodehouse, and as a bibliophile I decided that I needed to get my hands on some of those books.

The first book I read was called The Mating Season.  Not only is the plot delightfully farcical, but the characters are well-done, the vocabulary is stimulating, and the voice of Wooster (the narrator) is ridiculously fun.

For example:
“I say ‘the ghost of Jeeves’ because in that first awful moment that was what I had the apparition docketed as.  The words ‘What ho!  A spectre!’ trembled on my lips, and I reacted rather like the heroine of Murder At Greystone Grange on discovering that the Thing had come to doss in her room.  I don’t know if you have ever seen a ghost, but the general effect is to give you quite a start.
“Then the scent of bacon floated to the nostrils, and feeling that it was improbable that a wraith would be horsing about the place with dishes of eggs and b., I calmed down a bit.  That is to say, I stopped upsetting the tea and was able to mutter.  It is true that all I said was ‘Jeeves!’ but that wasn’t such bad going for one whose tongue had so recently been tangled up with the uvula, besides cleaving to the roof of the mouth.”

In this particular story, Wooster is asked by his aunt to stay with a family in the country.  His frenemy Gussie is supposed to go as well (ordered by Gussie’s fiancée), but is jailed at the last minute.  To save Gussie’s good name Wooster goes to the house pretending to be Gussie.  Then the real Gussie shows up and has to pretend to be Wooster.  In the middle you have about four pairs of star-crossed lovers all mixed up in each other, a hunting song, the “coshing” of a policeman, dog-snatching, movie stars, and much else.  And you can get it in paperback form from Amazon super cheap! 
Hover and click.  Hover and click.

In this case I really don’t know if the book is better than the television series.  On one hand, the book can go more in depth and you get even more Wooster (my favorite part), but Hugh Laurie does such an awesome job of capturing Wooster’s voice and Stephen Fry is the best Jeeves ever.  My advice?  Partake of both.  You will not regret it.

Monday, June 15, 2015

Mac and Cheese – Like an Adult!

My old college roommate is coming over for dinner.  When I lived with her a typical meal for me consisted of Oreos dipped in the milk of Cocoa Pebbles with more Oreos to follow the eating of the Cocoa Pebbles, so I want to wow her with my culinary skills.  The meal that will wow her?  Mac and Cheese.  Oh yeah.

This is no ordinary Mac and Cheese.  This is adult Mac and Cheese.  With cauliflower.  And chili powder.  And lotsa lotsa thyme, because thyme makes things taste more adult.

The Man and I received some vegetarian cookbooks for Christmas because his family was afraid we were going to starve if we took meat of our diet, and those cookbooks are awesome; they have definitely saved us from starvation a night or seventeen.  Today’s recipe is kinda out of Martha Stewart’s Meatless cookbook.

No, I'm not a photographer.  Why do you ask?
I say kinda because I don’t follow half the recipe.  She calls for an even more adult Mac and Cheese, featuring homemade bread crumbs and fancified tomatoes.  I hate tomatoes, and The Man complained last time I made the recipe with bread crumbs, so there go half the steps.  I’ll have my version of the recipe fully written out sans commentary at the bottom of this post, but if you’re feeling more fancy, feel free to purchase Mrs. Stewart’s book.
 
If this looks yummy to you, buy her book.
Step one: gather your ingredients.  You will need thyme, butter, pasta (calls for macaroni elbows; I used penne), veggie stock, flour, nutmeg, chili powder, milk, cheddar, parmesan, and cauliflower. 

You start off with some boiling salty water (salty like the sea, as the famous tv chefs say).  Put in 16 ounces of pasta.  Ignore it for a while.

While your pasta is cooking, whisk ½ cup of veggie stock (make sure you shake it before pouring!) together with 5 tablespoons of flour (all-purpose).  I just did it in the measuring cup, but if you’re feeling fancy you can do it in a bowl.  Put it to the side.

In a medium to large saucepan, melt 1 Tb butter.  Add a pinch of nutmeg, a pinch of chili powder (a pinch is around 1/8 tsp), ½ tsp thyme, and 1 tsp salt (which seems like a TON when compared to other stuff, but it’s right).
 
Mmmmm....salt...
Add 2 cups milk and 1 ½ cups veggie stock.  Whisk.

Whisk in that flour mixture you have off to the side.  Bring the whole lovely mess to a boil, then let it simmer 8 minutes (whisking frequently the whole time).  It was right about now that I realized my saucepan was cutting it close in the size department.

Motion-capture! 
After your butter/milk/stock/herb mix has simmered the proper amount of time, add about 2 ¼ cups of cheddar cheese and ¼ cup of parmesan.  Right about now is where I realized I should have grated the cheeses in advance.  Thankfully The Man was able to come whisk while I grated. 

 
I don't have a good caption for this.
You may be admiring my grater.  IKEA sells them; they’re wonderful.  It’s a grater, it’s a bowl, it’s a grater-bowl!  If you don't live by IKEA, Amazon sells them!  Click here to buy it!

Also, I am terrified of grating cheese once they get down to the tiny nubs so I just cut the nubs up into little pieces and threw them on top of the grated cheese.  My fingers thanked me.

Your pasta should have finished by now, so go ahead and drain it.  I poured some pasta into the sink when I tried to drain it, but that’s totally optional ;)  Throw the pasta into a 9x13 baking dish (or place gently).  Add about 1 ½ - 2 cups of chopped cauliflower (bite-sized – I guess I should have told you to chop it up prior, but mine was pre-chopped by me several days ago so I figured yours was too).  Pour the cheese mix on top.  Stir it all together!  Throw some more thyme on top because you’re an adult!


Num num nummy!  Nice and soupy. 

Preheat the oven to 400 degrees Fahrenheit sometime during this whole thing, then place your adult Mac and Cheese in the heated oven and bake it for 30 minutes.  It will start to brown a tiny tiny bit – that’s how you’ll know it’s done.  Let it cool, and then feast!
 
Bam!  Wow, my captions are all terrible.  Sorry. 
By the way, Martha Stewart’s dish was 530 calories per serving and I didn’t use low-fat ingredients like she did…this is by no means healthy.  It is delicious though.

If you want an option that takes fewer dishes, cook the pasta first, then drain it and put it in the 9x13.  Use the same pot you cooked the pasta in to make the sauce – don’t bother washing it in between because all it held was pasta, water, and salt.  One less pot to wash!

Mac and Cheese – Adult Style!
Ingredients: 16 oz pasta (macaroni, penne, fusilli, whatevs)
                     2 C veggie stock
                     5 Tb all-purpose flour
                     1 Tb butter
                     1/8 tsp nutmeg
                     1/8 tsp chili powder (or cayenne pepper, if you have it)
                      ½ tsp thyme (plus some more for the end)
                      1 tsp salt
                      2 C milk
                      2 ¼ C cheddar cheese
                       ¼ C parmesan cheese (or Parmigiano-Reggiano, if you’re rich and fancy)
                      1 ½ - 2 C chopped cauliflower (bite-sized)
Directions:
-Before you do anything, grate your cheeses and chop your cauliflower.  Done?  Okay, now we can continue.
- Boil salt water.  Once boiling, add pasta.  Cook about 2-3 minutes less than the package recommends for doneness.  Drain, rinse with cold water, drain again, set aside.  (Feel free to let it cook while preparing the other parts of the Mac and Cheese if you’re short on time.)
- Whisk ½ cup of the veggie stock together with the flour.  Set aside.
-In a large-ish saucepan, melt butter.  Add nutmeg, chili powder, ½ tsp thyme, and salt.  Whisk until combined.
-Add milk and remaining veggie stock to the saucepan mixture.  Whisk some more.
-Whisk in the flour mixture.  Bring the whole mix to a boil, then simmer it for 8 minutes, whisking frequently the entire time.
-After 8 minutes, add both cheeses to the mixture.  Whisk until the cheeses are melted.
-In a 13x9 baking pan, combine the drained pasta, the cheese mixture, and the cauliflower.  Once mixed, sprinkle a bit of thyme on top.
-Bake at 400 degrees Fahrenheit for 30 minutes.
-Allow to cool, then enjoy.


Friday, June 12, 2015

What RV is Right for You? Part 1 - Trailers

 I really want to write this post, but at the same time it’s super daunting.  So daunting that I considered just working out and writing tomorrow’s post instead.  If you know my feelings towards exercise, you now know how daunting this post is.

The problem is not the content, it’s getting all the information across without being boring.  See, The Man and I were trying to decide which RV we should live out of in our pipe dream future of being vagabonds, so I’ve done a ton of research on the topic.  Every single site I visited had good information, but it was just soooo boring.  So I’m going to give you two options today.

Option 1: Read this entire post, learn some trivia you can wow your friends with, and hope you don’t get bored.

Option 2: Check out the handy dandy spreadsheet of information I made instead (quicker version, but less entertaining…I hope).

Ready?  Let’s begin.

Growing up I always thought that RV just meant a motorhome.  You had RVs and you had trailers, but they weren’t the same thing.  Oh how wrong I was.  As you undoubtedly know, RV just means it’s a Recreational Vehicle.  Sooo many things are covered under the subject of RVs.  Today I’m going to focus on the ones you can live out of full-time, seeing as that’s my plan for the future (a girl can dream, right?).

We’re going to look at two main categories (trailer, motorhome) and some sub-categories of both.  I’ll tell you the pros and cons of each, and you can decide which one is best for your individual needs.  We’ll start with trailers.

Trailers
Travel Trailers
You can recognize travel trailers by their dorsal stripes and rufous throats, as well as their call: a hearty “Chirr-up!  Chirr-up!”  Wait, no.  I’ve been reading my birding book too much.  You can recognize travel trailers because they’re being towed by some type of vehicle and the hitch is distinctly between the two vehicles.  These can be super tiny (pulled by sedans) or pretty huge (pulled by trucks). 

Images taken from Google Images            
   
Living space: These have pretty low ceilings, but they can be roomy.  Some even come with “slides” (slide-out sections that can greatly increase space).
Storage: Not so good.  Little-to-no exterior storage, pretty sparse interior storage.  Most people store a lot of stuff in their towing vehicle.
Versatility: These can go most places your towing vehicle can go.
Driving: If you’ve never towed a big trailer before, think twice before buying one of these.  Jack-knifing is not just something gangsters do (yeah, I don’t know what gangsters do).  Wind can also be a problem, as well as really bumpy roads.
Gas Mileage: Compared to other RVs, this is great!  Only the Class B motorhome (we’ll get to that) is better.  Lots of trailers are smallish and try to be streamlined, and you can tow with a vehicle that’s not a huge gas hog.
Extra Needs: You definitely need a hitch.  Hensley hitches come highly recommended.  You’ll probably also need load-leveling bars and a generator.  Oh, and something to tow it with.  Make sure your vehicle is rated to tow the weight of your LOADED trailer.  Very important.
Set-up/Take-down: These are really difficult to back into spots, and the whole unhitching/hitching process is annoying.  Making sure it’s level can also be a hassle.  You’ll hate your trailer the first time you set up camp in a rainstorm.
Costs: Hands-down this is the best up-front cost (provided you have a towing vehicle already).  New travel trailers usually run from about 10k-30k, and their maintenance costs are pretty low.
Extra Tidbits: The climate of your trailer is not controlled while you’re driving, so you can get to the destination and have to wait for your trailer to cool down from 1000 degrees Fahrenheit.  Also, you have no idea what’s going on inside while you’re driving.  Fridge accidentally opened?  You’ll find out hours later when there’s food all over your house.  These also have a small water tank capacity, so you have to be super frugal with water use.  But who showers anyways?
                               
Wow.  That’s a lot of information.  Tell ya what, let’s make this a two-parter.  Today I’ll write about trailers, next week I’ll write about motorhomes.

5th Wheels
These are the best.  If you already own a beastly truck with awesome towing capability, get a 5th wheel.  For serious.  You can recognize 5th wheels because their hitching mechanism lays in the truck bed.  These are NOT truck campers though; very different. 

THIS is a 5th wheel.
Image from Google Images.
Living space: Oh so lovely!  Living in a 5th wheel can be like living in a small apartment.  Most of them have slides, so you just have all the space in the world.  Go ahead, throw a party in your trailer.  You can fit the whole neighborhood.  Plus, high ceilings!  Want a ceiling fan?  Get a ceiling fan.  No worries, mon.
Storage: These have wonderful interior storage (I mean, for a trailer, be reasonable), and their exterior storage is only beaten by Class A motorhomes.
Versatility: 5th wheels have awesome ground clearance, but their height clearance isn’t so hot.  Be careful about going under short bridges and trees.
Driving: It’s still a trailer, but it’s the mother of all trailers.  Since the hitch is in the bed of the truck, you have a lot more stability and turning/backing up/everything is much easier than with a travel trailer.  It does have some high wind resistance due to its height though, so be careful when driving through southern Wyoming.  These can be blown over by wind.
Gas Mileage: 8-10 MPG.  Not so great.  I mean, it’s a huge trailer, and you need a gigantic truck to pull it, so this is kind of a given.  If you’re using a RV just don’t expect to get any higher than about 15 MPG ever.
Extra Needs: Do you have a ginormous truck?  (Wow, spell check says “ginormous” is a word.  Cool.)  If so, check and double-check what it’s rated to tow.  Remember, factor in that your trailer will be loaded when you’re driving.  You’ll also need that bed hitch thingy and probably a generator (depending on what model you get).
Set-up/Take-down: If you want to unhitch your towing vehicle you really need level ground to do so, but other than that set-up isn’t so bad.  Spring for the electric or hydraulic jacks; it will be worth it.
Costs: If you already own that humongous truck the up-front cost isn’t so bad.  Most cost from around 15k-50k, but if you’re super-fancy they can cost as much as a small house.  These need more maintenance than travel trailers, but they’re still better than motorhomes.
Extra Tidbits: Like their smaller cousins, these are not climate-controlled when you’re driving.  They do have pretty nice water tank capacity though, so that’s good.

Destination/Park Trailers
Have you always wanted to live in a trailer?  Do you dislike traveling but you think it’d be cool to live somewhere new every year or so?  Do the words “hey y’all” tug at the cockles of your heart?  This is the trailer for you!  This is a trailer home.  It can move a little bit more, but pretty much it’s a trailer home.
Home Sweet Home.
Image from Google Images.
Living space: Did you like how the 5th wheel sounded?  Well this is even nicer.  Full fridge, electric water heater, direct hook-ups instead of tanks; welcome home.
Storage: These have little-to-no exterior storage (once again, not made to move around much), but their interior storage is lovely.
Versatility: Don’t expect to be traveling out to the boonies with this beast.  Due to its lack of storage tanks you’re pretty much stuck to RV parks.
Driving: If you have a gigantic truck and everything, go ahead and pull it to wherever you want to live, but it’s recommended you pay a service to drop the behemoth off for you.
Gas Mileage: Worse than a 5th wheel.  Once again, pay the service.
Set-up/Take-down: You HAVE to be somewhere where you can hook up your power/water/sewer.  Also, there’s no leveling system.  Have I told you to pay a service enough times yet?
Costs: New destination trailers run from around 20k-80k.
Extra Tidbits: This is not really the RV for you if you want to travel a lot.  If you’re someone that spends your winter months in Florida or something, this could be for you.  If you want to move every month, think twice.  Very homey and nice though.

Tune in next week for part 2: motorhomes!


Thursday, June 11, 2015

Singing in Public – A Tragedy

I was talking to my little sister the other day and she told me a story about how she was asked to sing in church and ended up crying during the song because of a recent tragedy in her ward (congregation).  Apparently it was pretty awkward and she ended up leaving the stage as soon as she finished singing – even before the accompanist had finished.  To make her feel better, I told her this story.

Several years ago I was in the exact same ward my little sister is now.  I was dating The Man at the time, and very eager to show him how amazing I was.  So when a friend and I were asked to sing a duet at Christmastime, I jumped at the chance. 

You can find the proper adjective for my singing voice somewhere between okay and good, but I don’t know if I’d go so far as to call it great.  I was feeling awesome about this duet though.  My friend and I just harmonized really well and it resulted in this really strong, really beautiful sound (or maybe it was all in my imagination).  I made sure The Man came to at least one practice since he wasn’t going to be there the day of the performance.  Everything went smoothly and I was stoked.

Fast-forward to the day we were set to perform.  Out of nowhere these butterflies erupted in my stomach.  The Man wouldn’t be there, but plenty of other people were – what if we sounded terrible?  What if we messed up?  What if everyone in the congregation would just be counting the seconds until we stopped singing?  It was bad.  We practiced one last time before church started and were sounding good, but nothing could ease my troubled heart.

And then church started.

And then it was time for us to sing.

We started out strong.  I can’t remember what the song was called, but I distinctly remember there was a line that said “for I was only a small shepherd boy” and since we were both girls we decided to change that one lyric to “girl,” and I always forgot to change it.  I was focusing on remembering that one word so that we wouldn’t sing two different words and ruin the entire song (at least, that’s what I imagined would happen if I sang the wrong word).

About midway through the song things were going awesome.  You could feel the spirit of the Holy Ghost in the room as we sang about Christ and all He did for us.  And then.

My voice cracked.

Voices crack when you sing.  It’s just a thing.  I have a pretty low range and when I have to go higher than like a middle G things get a bit iffy (sad, I know).  If I’m singing in the shower, in the car, to my cat, or pretty much any time other than singing in public I can crack and keep going no problem.  I guess usually I do a little chuckle at my inability to sing “high.”  This was not one of those times.

Back to the story.  My voice cracked.  I giggled a bit.  My friend gamely tried to continue singing as I sniggered.  Apparently I cracked mentally as well due to the stress, because I just could not stop giggling.  After about three awkward bars she started giggling too.  And then we were both up there, trying so hard (and failing) to stop giggling as tears rolled down our cheeks.  The pianist continued as strong as ever.  The crowd looked on in horror.  Every once in a while we would get a word or two out in an attempt to keep the song going, but mostly we just giggled for about a minute and a half until the song was over.

“So,” I told my little sister, “our family is just destined to make fools of themselves singing in that ward.  You had no choice in the matter – it’s fate.”

And no, I have not sung in church since.  At least not as a solo or duet.